Early Photography
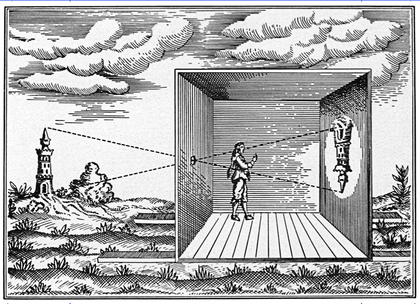
In the 9th century, the Camera Obscura was invented by the Arabian scientist, Alhuzen. Camera Obscura means 'dark chamber'. A camera obscura is a darkened box with a convex lens or aperture for projecting the image of an external object on to a screen inside.
Many artists in the 17th century were very fascinated in creating a realistic image. Capturing a photograph documents reality in an instant, using light and time to reproduce a moment, as it is perceived.
Many artists in the 17th century were very fascinated in creating a realistic image. Capturing a photograph documents reality in an instant, using light and time to reproduce a moment, as it is perceived.
Johann Heinrich Schulze, a professor of anatomy, after a number of experiments discovered that silver salts, specifically a piece of chalk dipped in silver nitrate turned black from white when exposed to the sun. The unexposed side remained white.
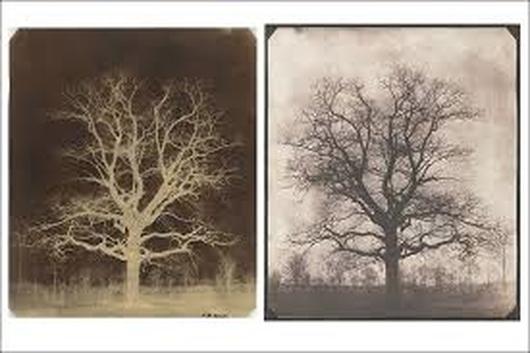
In 1834, an English scientist, Henry Fox Talbot, created the Calotype process. This is when paper is soaked in silver chloride and fixed with a salt solution. Talbot created positive images by contact printing onto another sheet of paper.
In 1834, an English scientist, Henry Fox Talbot, created the Calotype process. This is when paper is soaked in silver chloride and fixed with a salt solution. Talbot created positive images by contact printing onto another sheet of paper.
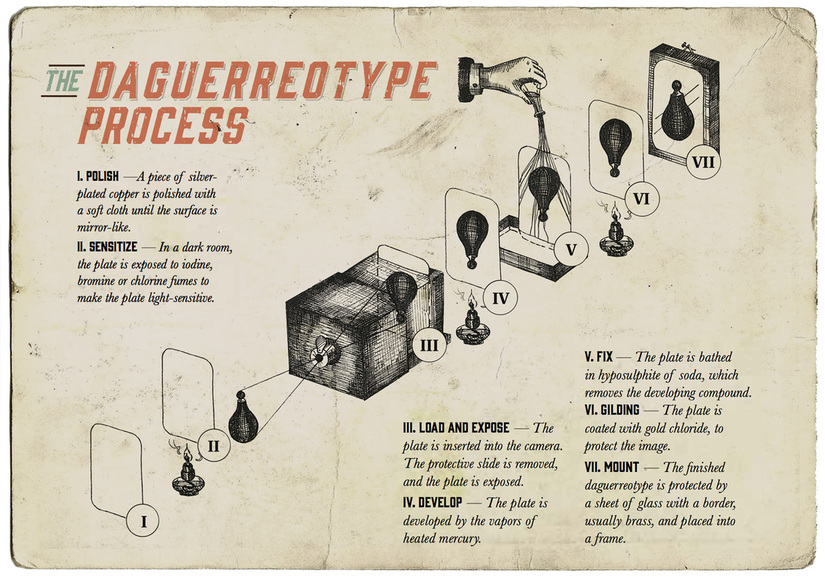
Louis Daguerre was a French painter and physicist who invented the first practical process of photography, known as the Daguerreotype. It used a silver plate which was polished and coated with silver iodide and "developed" with warmed mercury. The Daguerreotype could only make positive images so copies had to be made by taking another photo. He won the battle for the most popular type of photography over Henry Fox Talbot, mostly because the government made it freely available to the public.
|
Early photography had some problems. The early processes had extremely long exposure times, so to get a good photo you would have had to stand perfectly still for up to two minutes. Another problem with early photography was that a dark room was required at the location of the photograph which was a big hassle.
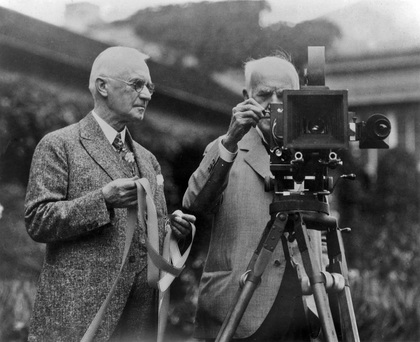
George Eastman invented the Kodak camera, helping make photography accessible to the public. His company remains one of the largest in the industry. Before this, he developed dry plate photography. This would allow exposed negatives to be stored and developed later in a more convenient place instead of carrying those dark rooms around. So the benefit of this process was that it was much more convenient than other photographic processes. |
|
|
Camera Obscura Steps to creating a camera obscura:
We then drew what we saw on tracing paper with a black marker. We initially used a pencil but we realised that it did not show up very well. The best conditions to achieve the clearest image was to be inside a room looking outside at an image. We had to cut the box so that the distance between the magnifying glass and the tracing paper had to be the correct distance so that it could achieve the right focal length. |
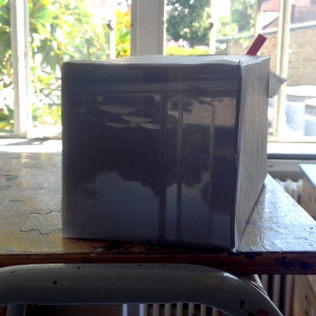
The image being projected onto tracing paper

Image of me drawing onto the tracing paper
|
Photograms
|
A photogram is a photographic image created without a camera. A photogram is created by placing objects on light-sensitive material and then exposing it to white light from above. The photographic paper is only affected by white light, colours like orange or red do not affect it (these are called safe lights). As the paper is highly sensitive to light, you have to make sure that you do not expose it to any light source from outside or else it will ruin the whole process.
The first thing to do is to take your light-sensitive paper and arrange your objects onto the paper (trying to be as creative as possible). Once the items are set up, expose it to the red light for about 3 seconds. By shortening or lengthening the time of exposure you can control how dark you want the background of the silhouettes to be. The shorter the time, the lighter the shade. Once you have exposed it, you have to put the paper into different substances so that you can develop your image. The first substance you place it in is the 'developer', any parts of the paper exposed to light will become a shade of black, this creates your image. The next substance you put it in is called the 'stop bath'. This is an acid solution that prevents over development of the paper. The last substance you put the paper in is the 'fixer'. This fixes the image so that when you put it in light, it doesn't turn black. We then placed the paper in water for about 5 minutes, this was to remove the processing chemicals. Finally, we dried the paper by putting it into a dryer. It was a bit hard to make my first photogram because I had to make sure that I didn't expose the paper to white light or else it would not have worked. I'm happy with how mine came out because all the objects I used came out very detailed and clear. If I made another photogram I would expose it for a bit longer than 3 seconds because the background of the silhouettes was a very light shade of black and I wanted it to be more black. |
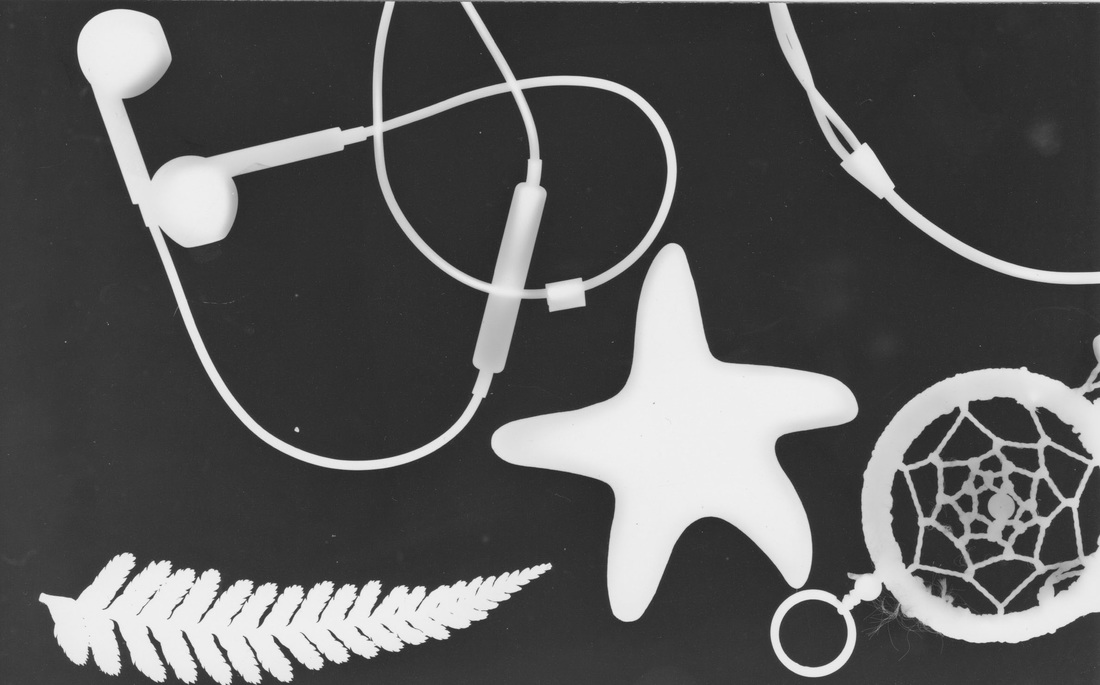
Photogram I produced
|
Philippe Halsman
|
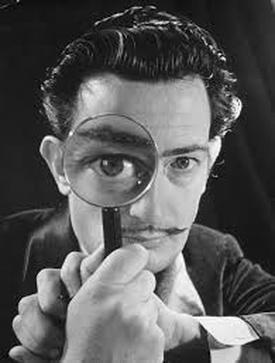
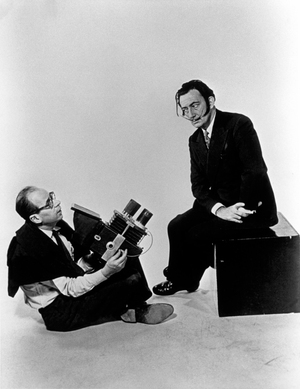
Philippe Halsman (1906-1979) was born in Riga, Latvia and began his photographic career in Paris. In 1934 he opened a portrait studio in Montparnasse, where he photographed many well-known artists and writers.
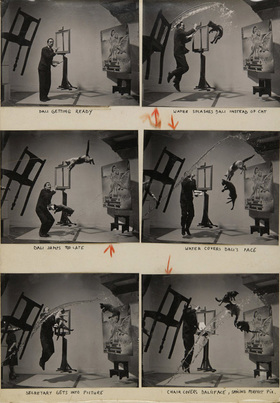
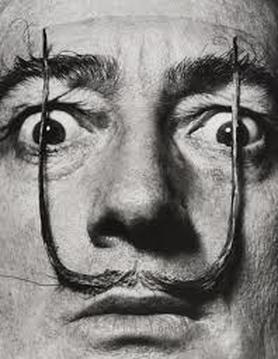
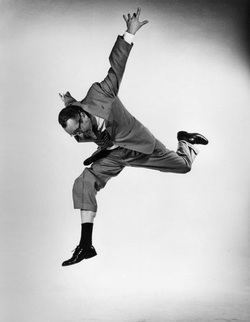
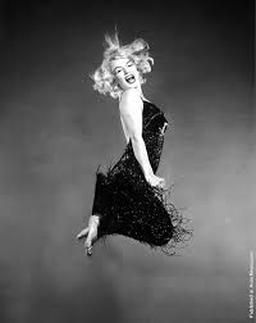
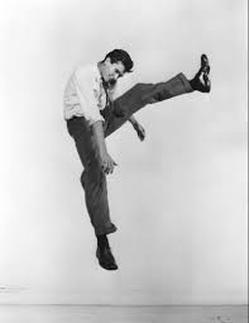
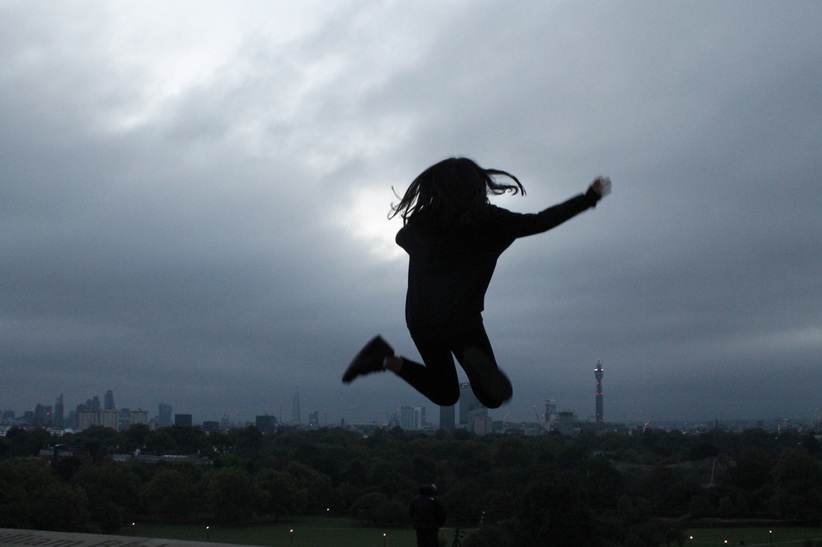
Halsman’s photographs of politicians, celebrities, and intellectuals were featured widely in magazines like LIFE and Vogue. His more famous subjects included the likes of Marc Chagall, Le Corbusier, Audrey Hepburn, and Albert Einstein. He also had a 37-year collaboration with Salvador Dalí, which resulted in several famous surrealist series including the “Dalí’s Mustache” portraits. In the 1950s, Halsman began asking his sitters to jump in front of the camera, because he noticed that doing so paradoxically seemed to relax people. In all of Halsman's 'jump' images, his intentions were for people to reveal their ambition or lack of it, their self-importance or their insecurity.
"Starting in the early 1950s I asked every famous or important person I photographed to jump for me. I was motivated by a genuine curiosity. After all, life has taught us to control and disguise our facial expressions, but it has not taught us to control our jumps. I wanted to see famous people reveal in a jump their ambition or their lack of it, their self-importance or their insecurity, and many other traits." –P.H. |
|
|
Jumping series
|
|
|
Shutter Speed
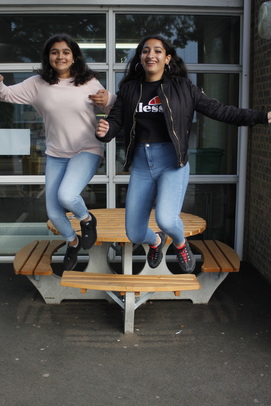
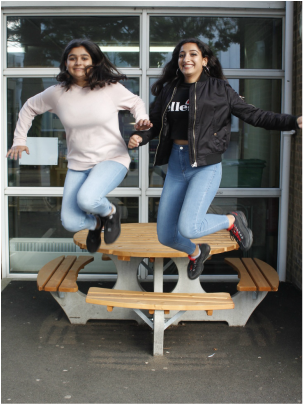
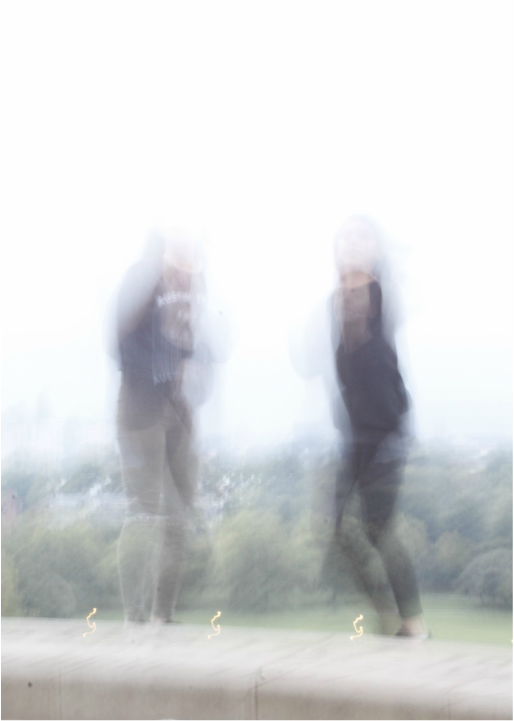
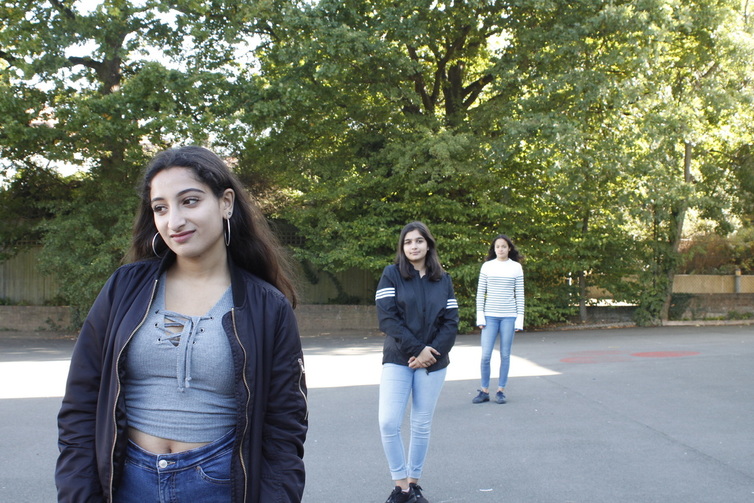
Shutter speed is the length of time a camera shutter is open to expose light into the camera sensor. Shutter speeds are measured in fractions of a second (when they are under a second). Slow shutter speeds allow more light into the camera sensor and are used for low-light and night photography, while fast shutter speeds help to freeze motions. In my images I used shutter speeds of 1 second, 1/250 of a second and 1/500 of a second.
1/500
|
1/250
|
1"
|
WWW: You can see that the higher shutter speed (1/500) froze the motion and it is a clearer, sharper image than the other two shutter speeds (1/250 and 1").

1/500
1/250
1"
WWW: I used the shutter speeds well and could see the difference in each picture.
EBI: I should have photographed all my images at the exact same time so there would be a very clear difference between the different shutter speeds I used.
EBI: I should have photographed all my images at the exact same time so there would be a very clear difference between the different shutter speeds I used.
Aperture
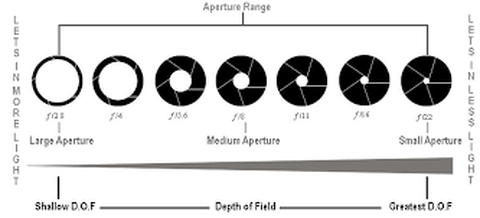
A hole within a lens, through which light travels into the camera body. The larger the hole, the more light passes to the camera sensor. Aperture also controls the depth of field , which is the portion of a scene that appears to be sharp. If the aperture is very small, the depth of field is large, while if the aperture is large, the depth of field is small. In photography, aperture is typically expressed in “f” numbers. In my images, I used an f stop of 3.5, f9 and f22.
|
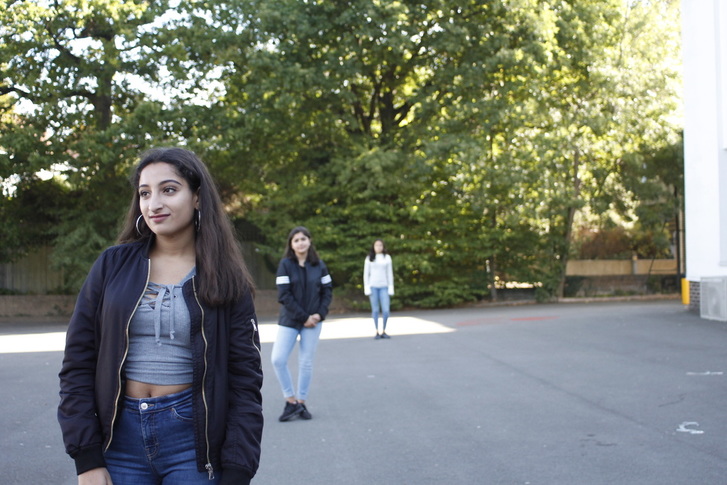
WWW: You can see the difference of depth of field in each image. The first image is just focused on the first object and as you increase the f-stop, the objects behind the first object become more clear.
EBI: Make sure that the first object is always in focus because in my last image, the first object isn't as focused as the first one. |

|

|

|
F3.5

F9
F22
